How to generate audio narration in JollyDeck (and fine-tune it)
JollyDeck AI narration automatically turns your course content into spoken audio using AI-generated voices — no manual recording required.
It saves you time by replacing manual voice recording, adds an audio layer that makes courses more accessible and engaging, and lets you scale narrated content across languages and audiences with ease.
Narration can be generated directly from your course content and adjusted to fit your needs. Audio generation is free and doesn’t use any AI tokens.
For step-by-step instructions and deeper insights into course narration rules, continue reading.
Generate AI narration for your course
When you generate narration of your course, the text on your slides is sent through AI voice synthesis, which generates an audio track and attaches it to the slide.
To generate the narration:
- Open your course in the Editor
- Click the headphones icon on the right of the top toolbar.
- Click Generate audio.
Depending on the length of your content, generation can take a few minutes. You can keep working on your course while it runs.
The rules of narration
By default, narration includes:
- Slide titles
- Headings and main text
- Call-outs
- All interactive elements and questions
- Image interpretation
Additionally, a subtle background music and sound cues are added for slide transitions, announcing interactive elements, and reflection time after answers — guiding the learner’s focus without distracting them.
Voice
Different narrators are used intelligently: one voice reads the main content, another describes images, announces videos, links and interactive elements.
Click to pause
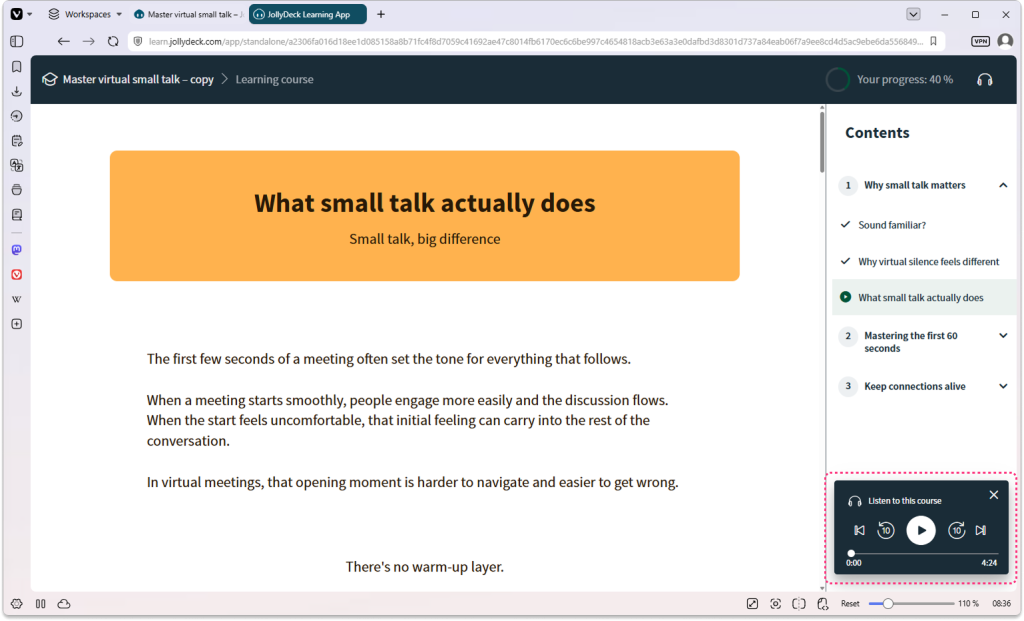
Whenever a learner clicks anywhere on the slide or an interactive element, the audio pauses. To resume, they click Play on the audio player in the bottom-right corner.
Interactive elements
When an interactive question appears, the narrator:
- Announces the question by reading its title (e.g. “Is the following statement true or false?”)
- Reads the question and its answers
- Instructs the learner to select an answer
- Gives the learner 10 seconds to reflect and respond, with subtle music playing in the background. If no answer is selected within that time, the course auto-advances.
For image galleries or image maps, the narrator announces that one is on screen and instructs the learner to review it.
Images
By default, the narrator announces that an image is on the slide and describes it in a few short sentences.
Adjusting narration
Once narration is generated, listen through it: open your course in the Preview tab and click Play on the audio player in the bottom-right corner.
As you listen, pay attention to how images, interactive questions, and specific terms — acronyms, brand names, domain terms — are narrated.
Exclude images or questions from narration
You may want to exclude certain images or questions from narration, for example:
- Decorative images that don’t add learning value
- Questions you’d like learners to read and answer at their own pace
For excluded questions, the narrator only instructs learners to read the question on screen and submit their answer. The audio then pauses, giving the learner time to read and respond. Once done, they click Play on the audio player in the bottom-right corner to continue.
Excluded images are not announced or mentioned in the narration at all.
Narration settings for images and questions can be found in the Editor when editing the element:
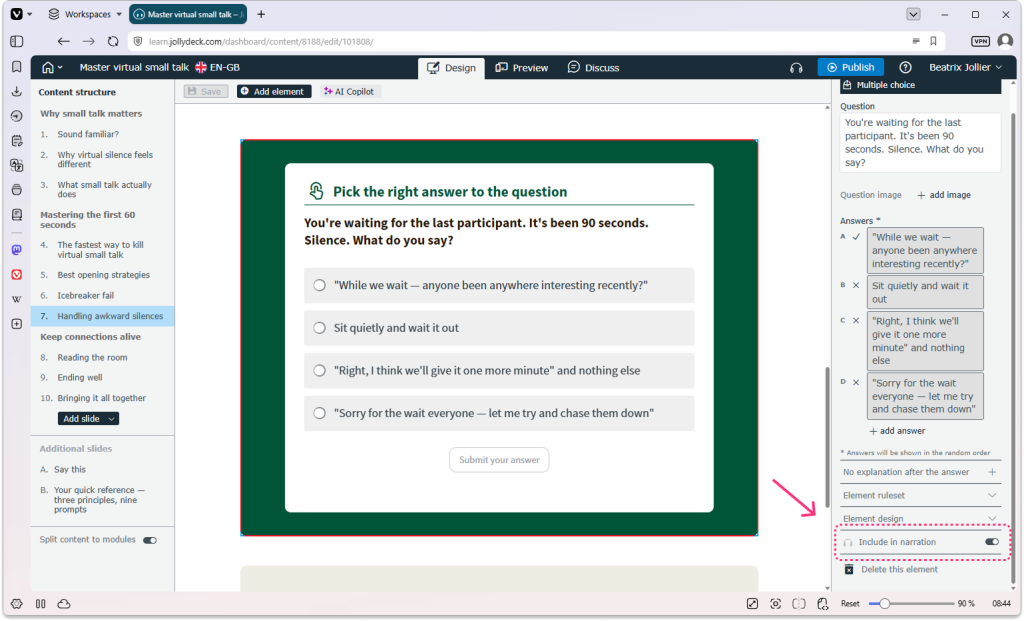
For a step-by-step guide, see our FAQ: How to exclude images and questions from narration?
Adjust pronunciation settings
Some terms need a bit of help, since the AI voice may not pronounce them correctly by default. Common reasons to add a custom pronunciation rule include:
- Acronyms, specific for organisation, industry, or department (e.g. PHI in data protection, SCORM in e-learning)
- Brand names
- Technical or domain-specific terms
- Non-English proper nouns
Pronunciation rules are set per language and apply across course narration and interactive videos in all your content.
You can access pronunciation settings:
- From the pop-up window used to generate narration in your course
- From the audio player in the Preview tab (bottom-right corner)
- In the Brand & Style module
For a step-by-step guide, see our FAQ: How to add pronunciation rules for AI narration?
What happens to narration when you edit content
Narration regenerates automatically whenever content is edited — no manual re-generation required.
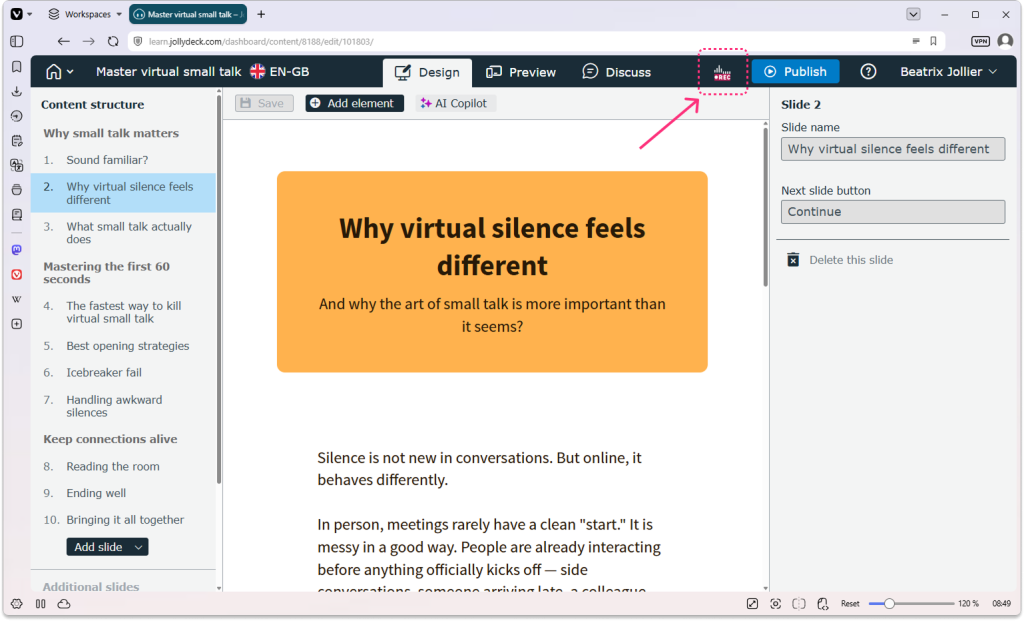
Whenever you make changes and click Save, new narration is generated automatically. This is reflected in the Editor’s top toolbar, where the narration icon (speaker) temporarily changes to a recording icon while generation is in progress. You can keep working while it runs — the latest saved version of your content is always the one used for narration.
Want more on the technology and thinking behind JollyDeck’s narration?
Read our blog post AI narration in e-learning: (Re)introducing text-to-speech to JollyDeck.
Other related resources: