Convert a document into a course (without losing what matters): A quick guide
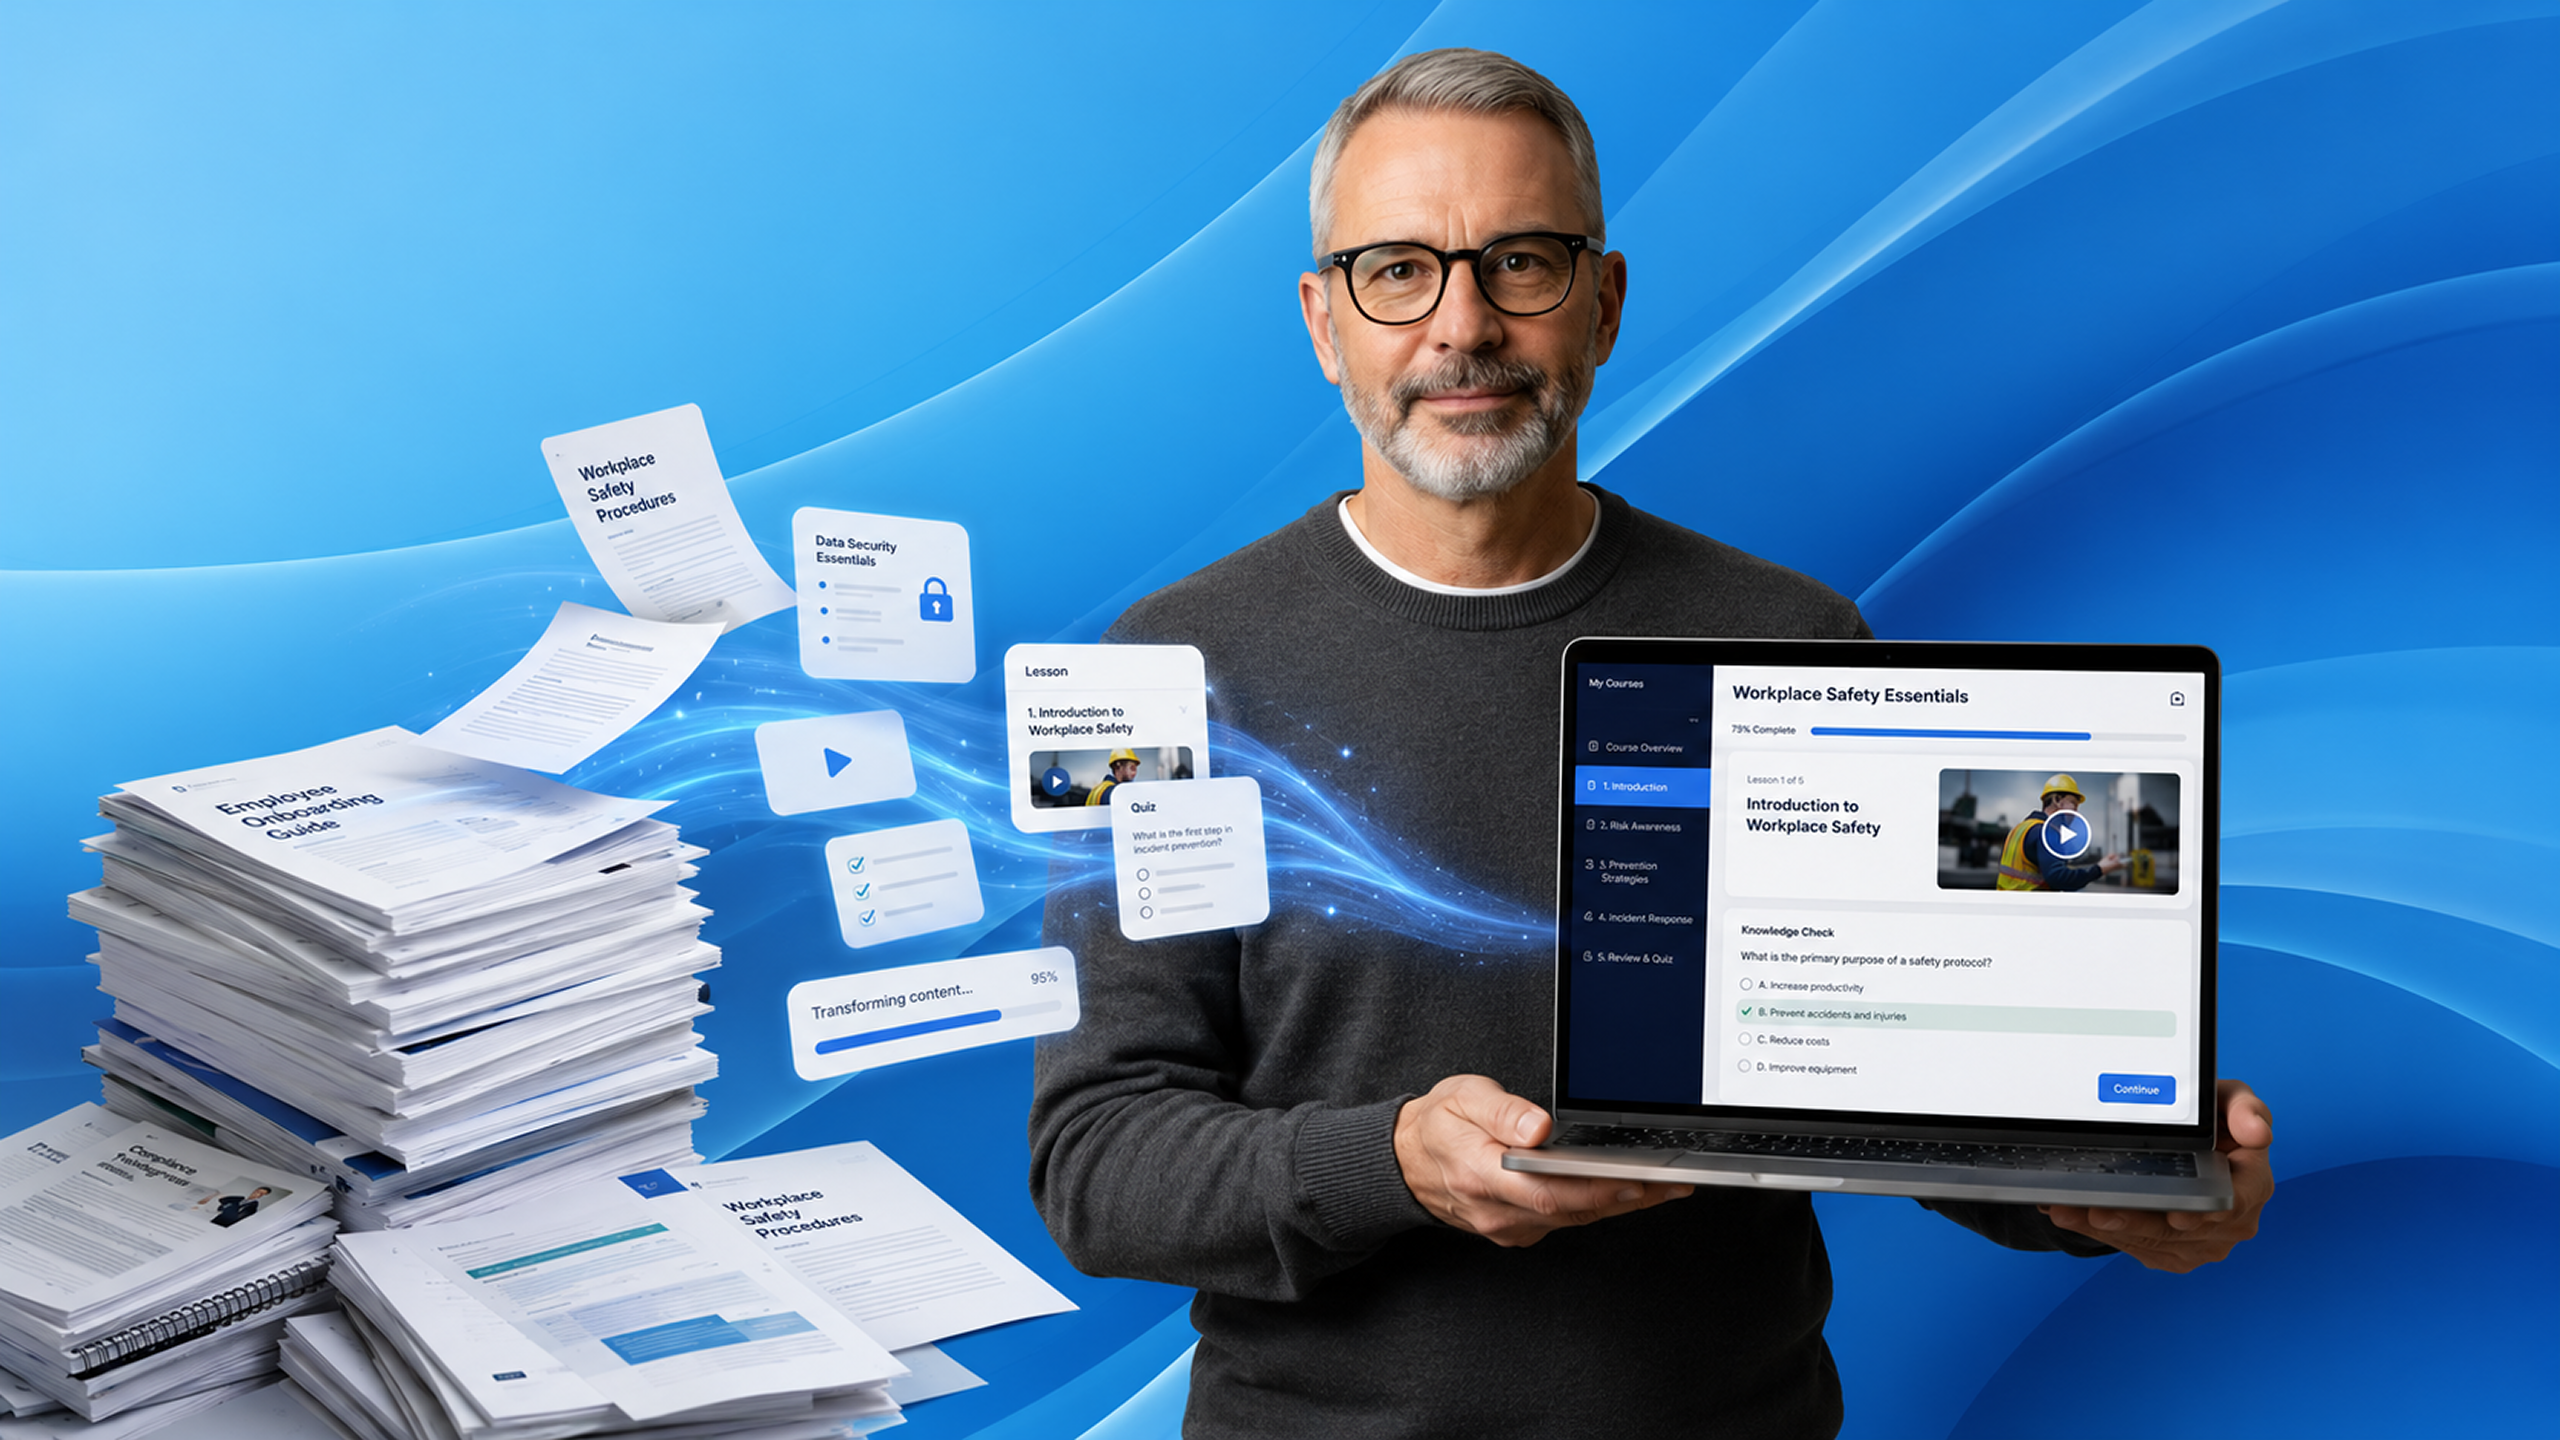
The risk with any AI conversion is ending up with something that looks like a course but doesn’t quite say what you need it to say. JollyDeck gives you several points in the process where you can intervene — adjusting structure, depth, and writing style before generation starts. This guide shows you where those points are and what to do with them.
1. Choose the right source document
The conversion starts before you upload anything. The quality of the output depends heavily on what goes in — so choosing the right source document is the first real decision in the process.
The converter works best with documents that contain actual subject matter:
- ✅ Structured knowledge learners need to acquire
- ✅ Explanations and technical content
- ✅ Step-by-step processes and procedures
- ✅ Job aids and reference materials
Documents that lack teachable content by nature won’t convert well:
- ❌ Promotional brochures and marketing materials
- ❌ Guides about course creation or learning design
- ❌ Assessment forms and tests
- ❌ Slide decks built around visuals with minimal text
A simple test: does the document contain actual information on a topic — facts, steps, explanations, or know-how? If yes, it’s a good candidate. If it mainly promotes, instructs on an unrelated process, or asks questions without providing answers, look for a different source.
2. Build the outline
Start by uploading your file. Before building the outline, JollyDeck will ask you a few questions. Your answers help it interpret the source content and structure it in the right way.
Once that’s done, JollyDeck generates the first outline. Everything from this point builds on it, so it’s worth understanding what’s happening at this stage before moving forward.
3. Review and refine the outline
The outline is where you have the most control over the final result — and the right moment to use it, before generation starts and the content takes shape.
You can adjust the outline manually or use AI to help you reshape it. Ask it to shorten the outline, expand certain parts, or reorganise the content around a clearer learning flow. You can also generate different outline versions and compare them before deciding which one to take forward.
4. Choose the conversion settings
With the outline confirmed, you can decide how the content should be written and presented. This is where you set the writing style, the level of learning guidance, and whether to include interactive elements — choices that directly affect how the finished course reads and feels.
You can also preview the writing options and review the design settings before committing, so there are no surprises once the course is produced
5. Generate the course
Once the settings are confirmed, generation runs automatically. You don’t need to stay on the page — you’ll get an email when the course is ready.
When you open it, you can read through the content, try the interactive elements, and make any final adjustments in the Content Editor. This is where you’ll see how your setup decisions came together and where you can fine-tune anything that needs a closer look.
Bonus tip: working with images from your source document
JollyDeck extracts images from the source document and places them in the right positions within the course slides. But not every image will make the cut automatically — and if there’s one you need, you don’t have to go back to the original file to find it.
All images extracted from the source document are stored in the Project gallery of your course, where you can access them at any point and add them manually where needed.
Ready to try it?
Upload your PDF, Word document, or PowerPoint file and see how JollyDeck structures it into a course — you stay in control of the result at every step.